Annotations & Styling
QuickPose provides high definition annotations at a minimal performance cost.
| Points | Overlay | Measuring Line | Range Of Motion |
|---|---|---|---|
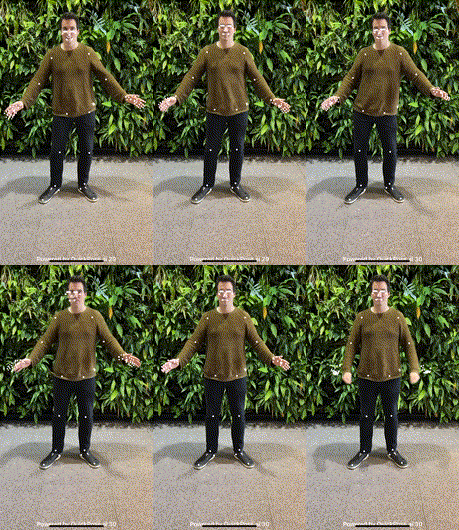 | 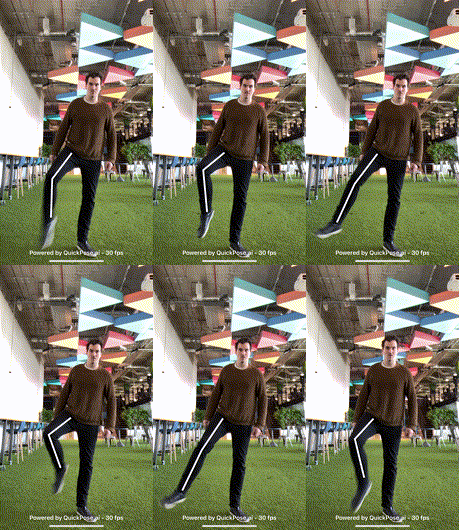 | 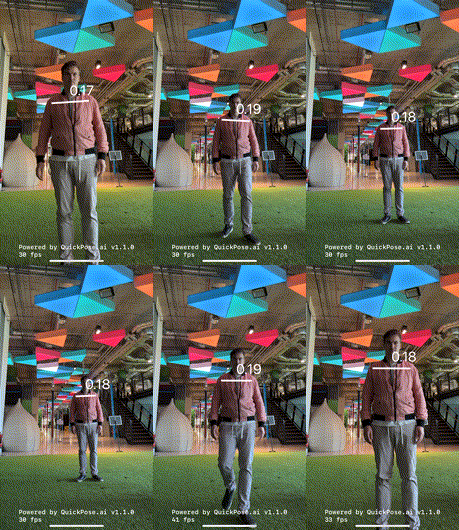 |  |
As annotations provide important visual feedback to your users, quickpose defaults to display an annotation for every feature.
There are cases where the body overlay is not automatically drawn:
| Exercise Guide | Inside Box |
|---|---|
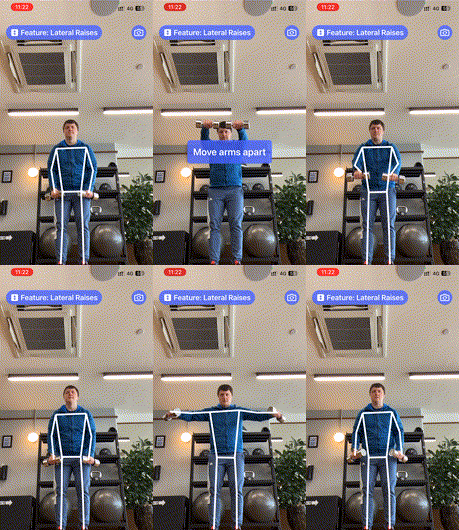 | 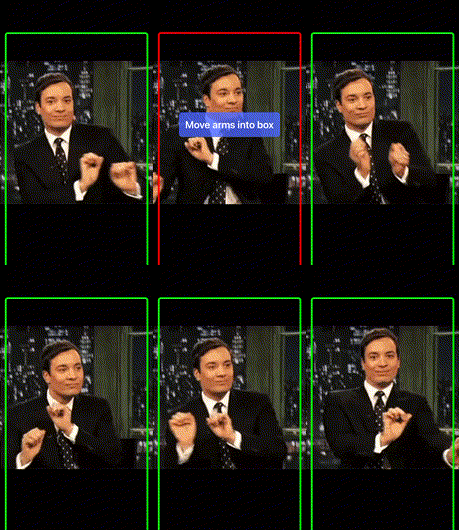 |
In the Exercise Guide example, when the user is not standing or performing a move correctly, the body overlay is turned off, providing a visual clue to the user's mistake and does not draw focus from the feedback message "Move arms apart" shown in an overlay.
For Inside Box, developer's have to choose whether to implement the skeleton whilst the user is not in the correct position.
Points
This feature visualizes what landmarks have been found by the underlying ML model.
case showPoints()
case showPoints(style: customStyle) // with a custom style
Use this feature when changing the model complexity, for example for performance tuning, as some model versions don't track the face and hands in the same resolution, so whilst you may get a faster frame rate you may be losing key landmarks you need for your app to work.
Overlays
Whilst overlays are returned in overlay image, they don't provide a numeric result. These are intended to provide visual feedback to the user, and are often included in higher level features such as range of motion or fitness features.
case overlay(feature: Landmarks.Group)
case overlay(feature: Landmarks.Group, style: customStyle) // with a custom style
Overlays accept a landmark group:
case none
case wholeBody
case wholeBodyAndHead
case upperBody
case straightArmsUpperBody
case toWristsUpperBody
case shoulders

case arm(side: Side)
case armToWrist(side: Side)
case armNoElbow(side: Side)
case straightArm(side: Side)
case hand(side: Side)
case leg(side: Side)

case lowerBody
case hips
case elbows
case knees
case legs
case arms
case head
Customizing annotations
To specify a smaller line width set a relativeLineWidth:
let smallerStyle = QuickPose.Style(relativeLineWidth: 0.33)
let feature1: QuickPose.Feature = .overlay(.upperBody, style: smallerStyle)
The style entries are relative to the original drawn size, so this will be 1/3 of the size of the default line width.
For shrink the angle markers of a range of motion measurement override relativeArcSize and relativeFontSize, as the rangeOfMotion renders text on screen.
let smallerStyle = QuickPose.Style(relativeFontSize: 0.33, relativeArcSize: 0.33, relativeLineWidth: 0.33)
let feature1: QuickPose.Feature = .rangeOfMotion(.shoulder(side: .right, clockwiseDirection: false), style: smallerStyle)
If you would like to see no annotations for your feature set the hidden value to true
let hiddenStyle = QuickPose.Style(isHidden: true)
let feature1: QuickPose.Feature = .overlay(.upperBody, style: hiddenStyle)
However, we don't recommend this approach as annotations give the user feedback that they are visible to the camera, and what is expected of them,
Conditional Styling
QuickPose allows the annotation color to provide visual feedback on a user's movement.
| Target Range | Warning |
|---|---|
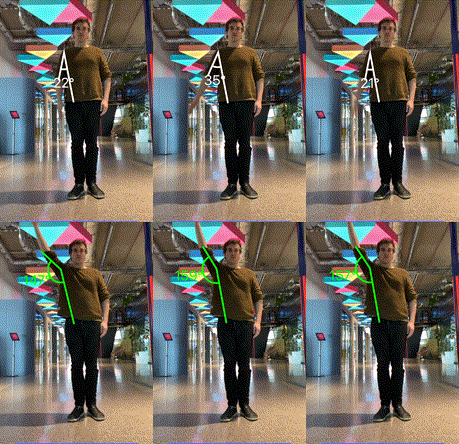 | 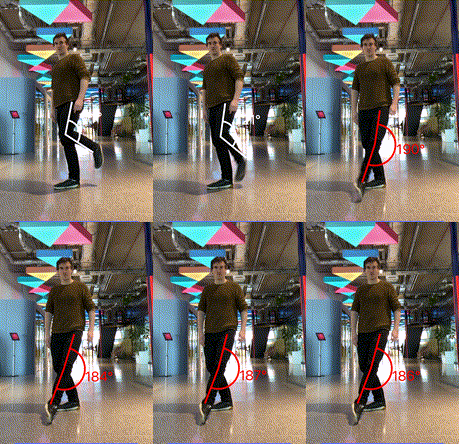 |
The above gifs demonstrate the two major use cases: displaying visuall when the user has entered a target range or has entered a dangerous range. Keep in mind that target or dangerous ranges vary by user and exercise.
For conditional highlighting when the angle goes above 120 degrees use:
let conditionalStyle = QuickPose.Style(conditionalColors: [QuickPose.Style.ConditionalColor(min: 120, max: nil, color: UIColor.green)])
let feature1: QuickPose.Feature = .rangeOfMotion(.shoulder(side: .right, clockwiseDirection: false), style: conditionalStyle)